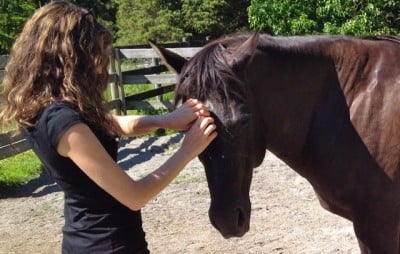
 All horses like to itch, scratch and rub themselves on an ongoing basis. But during shedding season the urge to itchy-scratchy gets pretty intense. So if you can set up a sturdy self-scratching area (the edge of a barn, a designated post, a big tree) this can help prevent your fences and gates being destroyed by itchy butts, heads and necks.
When creating a scratching post or area for your horses, you can choose from some great professional solutions, or you can utilize old brushes, curries and grooming massage tools. Or, you can buy acupressure pads and massage bath mats (designed for humans) and use those. Or, a mix of any of these can also work well.
Let’s start with the pro solutions so we can kick off with this video showing you WHY giving your horse a self-scratching area is such a great idea.
Equine Scratching or Itching Pads
You can purchase equine scratching pads like these Itchin Post pads, and you can see in the video how horses love them. This is actually my preferred brand as I like how long the protuberances are, but they are expensive at $59 for a 24″x14″ pad:
Scratchnall is another well-made popular product, but you can only attach it to flat surfaces, or corners (90 degree angle), they will not wrap around a post or tree. And each $16 pad is only 5″x6″
Re-Purposed DIY Scratchy Surfaces
Here are some other things you can bolt/screw onto the surface of a post, or stall door, or wall – that you may already have lying around:
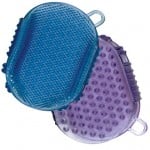 I’ve yet to meet a horse (tried on 9 so far) that doesn’t LOVE this jelly scrubber massage mitt. You can cut it open on one side so it lays flat and then screw it to your scratching post, or stall door, or wall. If you have any old Grooma curry combs lying around, they also work well – especially for butt scratching as they have good sized sticky-outy bits.
 None of my horses like being groomed with a stiff curry like this, but it’s perfect for a scratching post, or affixing to the side of barn, or along the top of a railing or stall door.
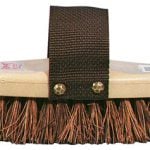 Stiff brushes like this are perfect to screw into the top of a post or rail for horses to itch the underside of their jaw.
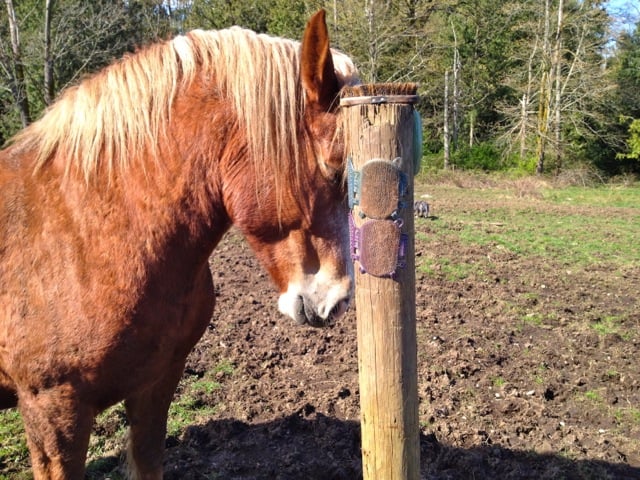
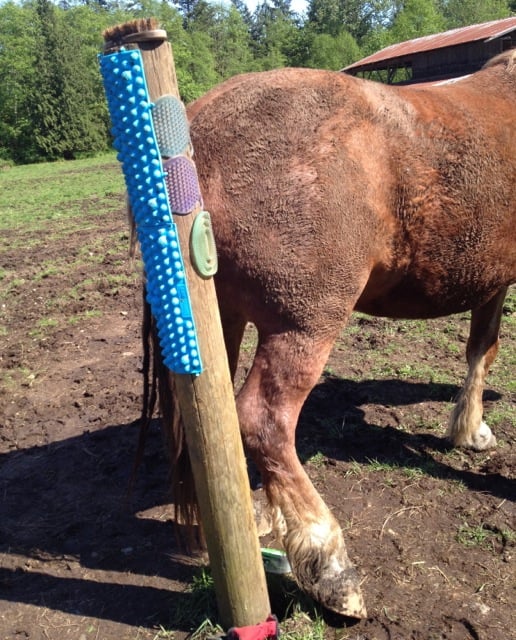
Here’s what these re-purposed grooming tools look like after I screwed them onto a 6″ diameter post I had pounded into the center of my pasture. I used 2.5″ long screws. It would have been better to have some washers between the screws and the jelly scrubbers as they’re very soft plastic, but hopefully they’ll last a while before tearing off (it’s been 3 months and they’re still good!).
Place your scratchy surfaces so your horse can itch her face:
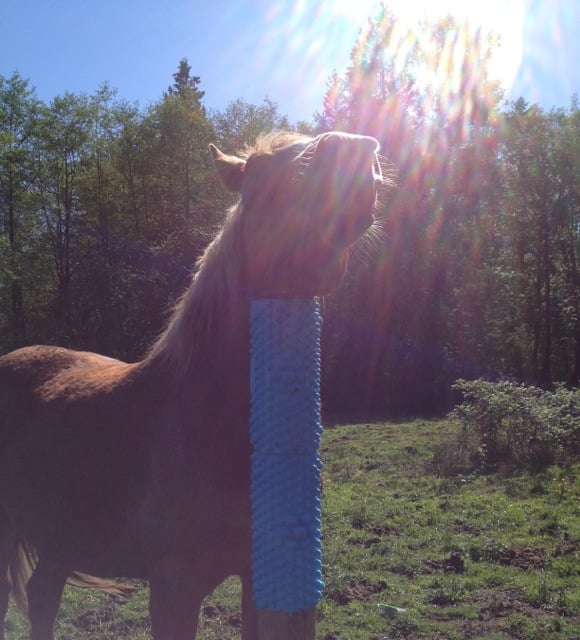
And then she can scrub the underside of her jaw along the stiff brush at the very top of the post:
And place some at the right height for her to rub her butt against:
Other Low-Cost Scratching Mats
You can also browse through your local hardware store and see what kind of entrance mats they have. A very stiff artificial turf, or a scratchy natural fibre doormat (coconut, sisal, etc.) can work well.
 Then, after a lot of searching, I found these Nemoyard acupressure mats on Amazon at a decent size of 15.5″x11.5″ and you can get two for $30. The description says it is made of 100% eco-friendly TPE plastic (no bad smell). The acupressure knobs look to be a good size for equine rubbing and itching.
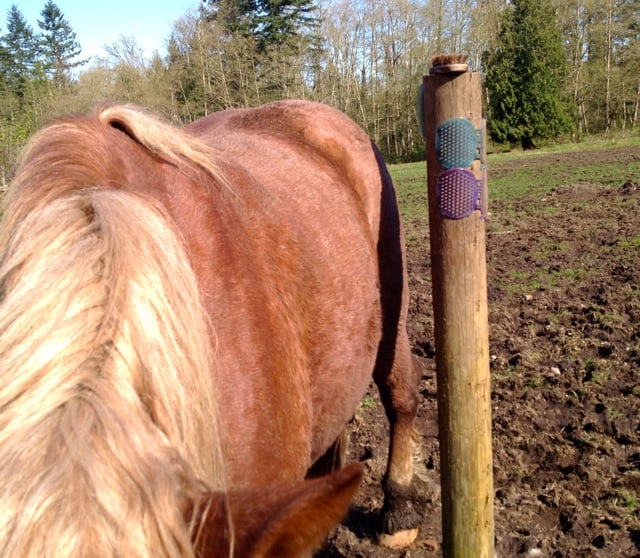
So I ordered a set and added them to my scratching post – you can never have too many places or textures to itch and rub against! And yes, the horses are using these to scratch both heads and butts. They seem to especially enjoy getting at their poll and other itchy places around the forehead with the round knobby bits:

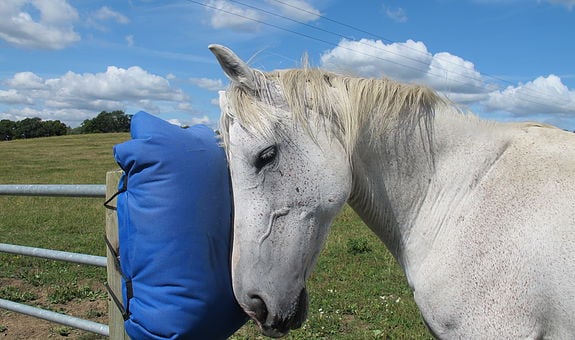
The other thing I tried was a Pillow Post that I ordered from the UK. This gives the horse a much softer surface to rub their head on. You just stuff it with an old pillow and then you can tie it to a post or tree. I think this may work well for older horses, but my two-year-old stallions tore their Pillow Post off the post and stomped it into the ground – it was a toy for them, rather than something to itch themselves on! I’ll try it again when they’re older (they’re gelded now) and see how the herd likes it then.
Personally, I would never afix a scratching surface to a fence or gate post – why would I want to encourage my herd to destroy my fence? If I had a really sturdy barn, I may use a corner of an outside wall. Or inside a stall would be okay. Just remember that your horse will be putting a lot of weight behind the rubbing, so afix your scratching surfaces to something that can take 1000 lbs leaning and pushing on it – repeatedly.
Here’s what I mean: my scratching post was sunk 4 feet into the ground and take a look at what’s happened to it in the softer ground of Spring and early Summer:
Which is fine – it still works great as a scratching post – even though it’s so loose now that I can lift it right out of the ground if I want to! But I wouldn’t want this to be a fence post, or gate post.

Jini Patel Thompson is a natural health writer and Lazer Tapping instructor. She began riding at age 2 in Kenya, and got her first horse at age 8 in Alberta, and so continues a life-long journey and love affair with these amazing creatures.


Wonderful idea thank you!
Do you ship to Canada? Need these scratching posts!!
Hi Joelle!
Try some of the links for the scratchy pads Jini tested – I’m not sure if she got them shipped to her home in Canada or her work in the US, but likely some of the companies mentioned above do ship here.
Good luck!
This is great thank you – my pony has to ensure 6 weeks of box rest due to injury and I was looking for stable enrichment ideas.
You’re welcome Nicola! And just to give you an alternate view/story about injuries… check out this video. You can see around the 30-minute mark how badly Makah was injured. In the next video (Part 2) you will see how he directs his healing and the amount of rest he needs. I’m working on Part 3 now, but he is completely healed and was never stalled, despite some people on YouTube telling me that he’s injured so badly he’ll never move properly again, and I should euthanize him:
https://youtu.be/ILypGrLjE54