For those of you that live in rainy climates (like the Pacific Northwest or the U.K.), or, maybe you get a really intense rainy season that lasts for a couple of months, then you know how nasty your paddock and pastures can get from the drizzly onslaught.
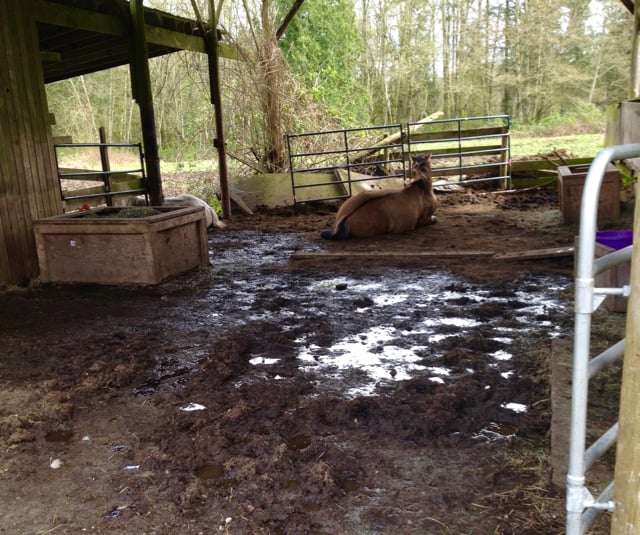
So let me take you an a little pictorial journey through my experiments over the last couple of years, to try and prevent my big covered barn in BC, Canada, from turning into THIS every Spring/Winter/Fall:

I’m going to share my experiments with you, and also what I’ve learned – to hopefully shortcut your own learning curve and give you some solid tips to follow if you’re faced with a similar situation.
What wants to happen?
The first step in figuring out how to create effective drainage – via culverts, trenches, or other means – is to first do nothing. And just study your land. If you have the luxury of simply watching your land for an entire year (to observe a complete cycle of the seasons) that is the absolutely the best course of action and will save you plenty of time and money.
Of course, you could also call in someone like Sarah Lockwood; who would be able to assess your property from a geological standpoint and ‘read’ your land like an open book. And when I do buy my own land, I am definitely consulting Sarah! But for us mere laypeople, or those of us who are boarding, giving the land time to show you what naturally wants to happen each season is definitely the wisest plan.
Let’s take the simple example of my barn. After we cleared a decade of junk out of the main barn, this is what was left. This picture was taken in the late summer (for those of you who are regular readers, that is Kesia’s horse Spero up on the ledge). You can see that the paddock outside the barn – even before it was graveled – is higher than the barn floor. So guess where the water’s going to go when it rains?

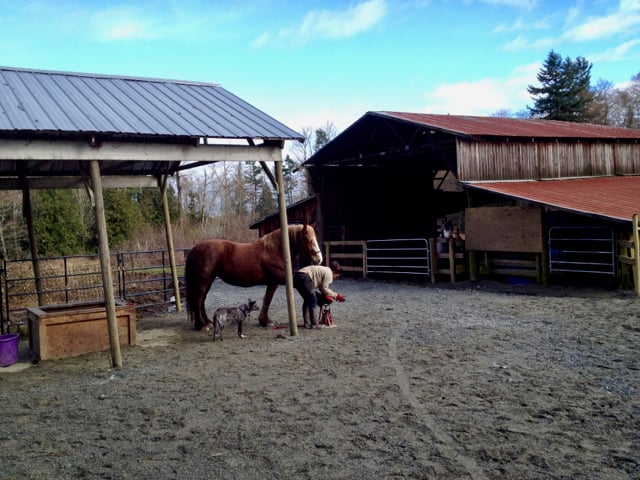
And then we look at the paddock itself – you can see that it is naturally sloping down towards the barn, the field, and the blackberry patch on the left hand side:
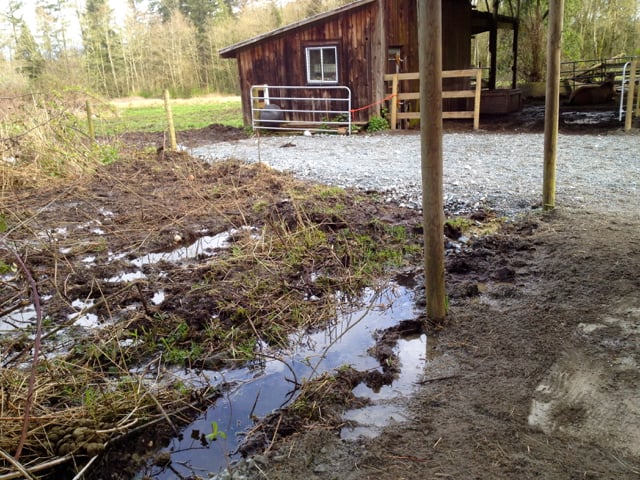
So the first decision was to simply not gravel the blackberry area. We cleared half of the blackberry bushes out, but then left it bare so the water could congregate where it naturally wanted to go. Interestingly, the horses then turned this bare area into a pooping area.
For the main barn – and the sloped-roof area right next to it, where I store my hay – a drainage solution was definitely needed. The first winter I simply dug a culvert along the side of the graveled paddock; to draw the water down and out to the field.
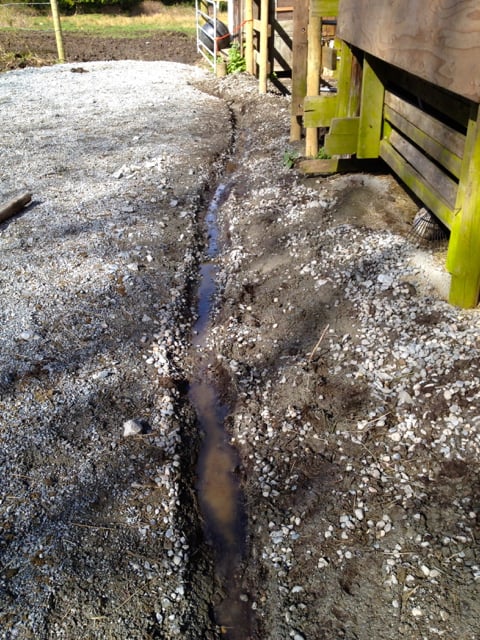
Tip: If you can, dig your culvert during wet weather, because then you will be able to see instantly if the path you’re digging is where the water naturally wants to go. You will also be able to determine whether you have dug your culvert with enough of a downslope for the water to flow easily.

A culvert or trench should not just be a flat trough; you need to have it higher at the intake point and lower/deeper at the outflow or exit point – with the culvert gradually sloping downwards between the intake and exit. Water flows best downhill!
The problem with this simple culvert solution is that – silly me – I thought the horses would just step over the culvert, when going in and out of the big barn. And they did not. They destroyed the culvert. So I experimented by laying 2×12-inch boards across the top of the trench – which my 1800 lb Belgian would then step directly on top of, and either squish the boards down, or tilt them sideways.
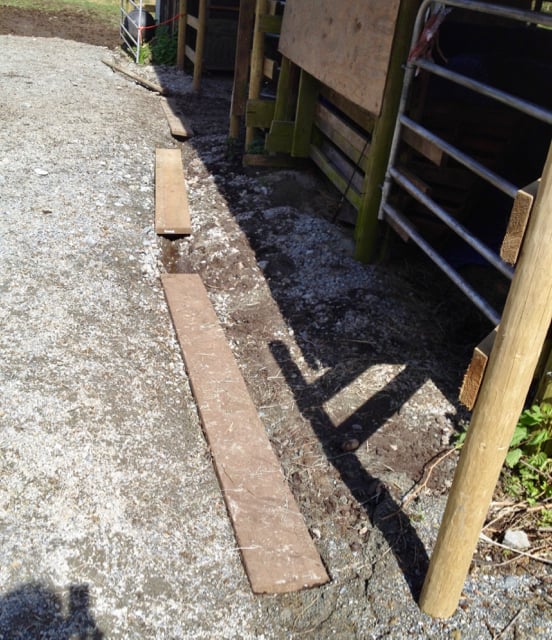
Round two…
So after re-digging the culvert 5 times (takes at least an hour each time) I talked with my tractor guy and he suggested filling the trench with river rock, so the horses could step on it, but the water could still drain through the rock. Here’s what river rock looks like:

And here’s the culvert filled with river rock:

Did this work? Hell no. The herd simply churned up the gravel and river rock together until it was a solid mess and there was no more drainage to be had!
Keep in mind, I do not have sedate, slow-moving horses. I have 4 horses under age 4 and they tear around, wrestle, leap, and skid sideways on my gravel, like this:
Round three…
The following Fall I decided to also put some gravel down on the dirt floor inside the big barn to help keep it drier and the excavator guy I hired had the idea to lay some sewer drainage pipe in the culvert in front of the barn, and then cover it over with gravel. Sounds like a plan to me!
First step was to remove the soft dirt/mud from the floor of the barn:
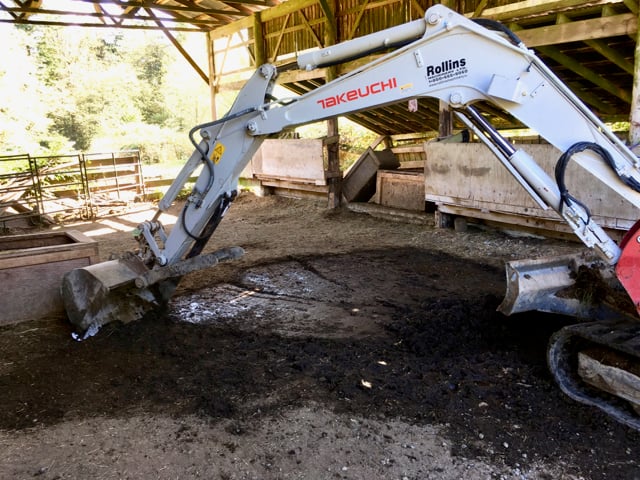
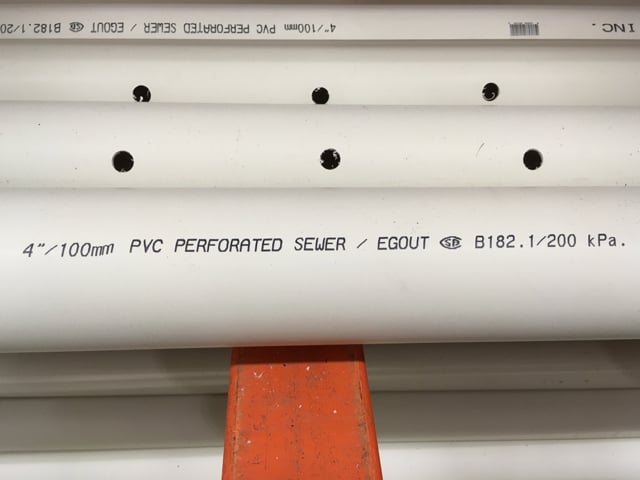
This is the very inexpensive pipe we used from Home Depot (needs to have holes along the sides, and when you lay the pipe, the holes should face down):
And here it is in the culvert in front of the big barn entrance – this is the passageway that gets the most traffic.
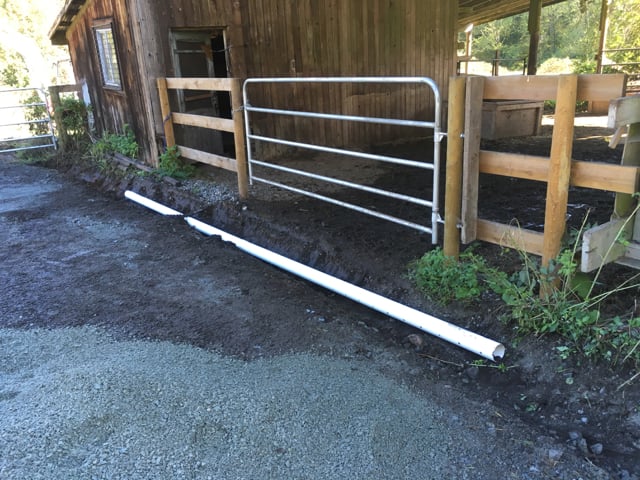
You can see this drainage pipe will be able to handle the horse’s weight no problem!
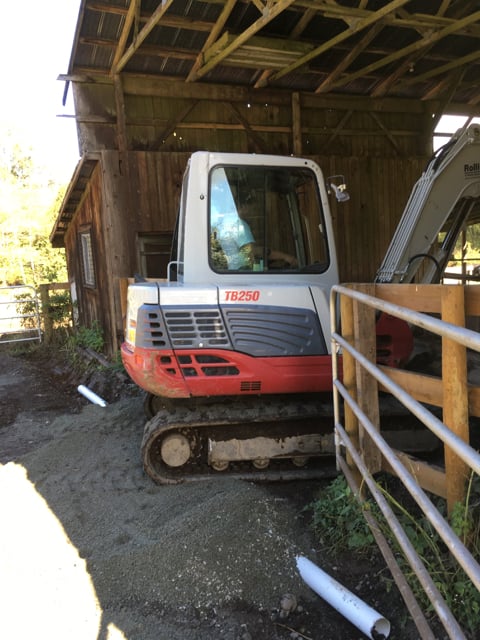
And here’s what it looks like all finished and ready to solve my wet barn problem:

But… NOT!
By the time we hit the end of February (5 months after installation), here’s what it looks like:
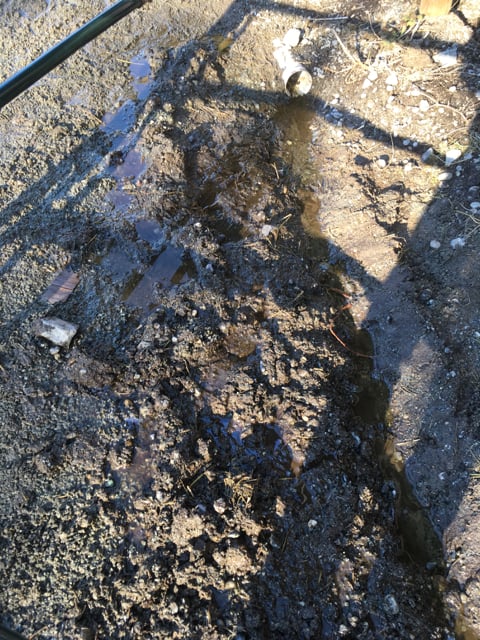
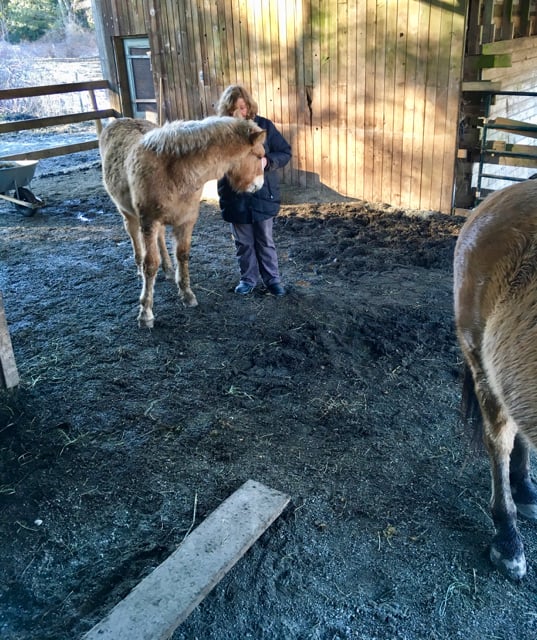
The barn inside is not flooded, but there are a few wet spots. The worst spot has about 2 inches of mud – the gravel has just been churned into the dirt underneath. Overall it feels damp/soggy when you walk around, but it looks okay in most places, for example:
Round four…?
So, this sort of solved my drainage problem… but had it all be done correctly, I think it would have worked brilliantly! As they say – god is in the details. After my own learning curve, along with copious further research, here’s what I should have done, and will definitely do differently next time:
~ 2018 UPDATE ~ Here’s my tutorial on what I DID do differently, as I installed a French Drain.
1. Adequate, Smooth Slope
Getting the culvert dug with that downward slope we talked about is of crucial importance! Then, when you lay the pipe in the culvert, you need to double-check that the pipe is not being pushed up at any points by stray/buried rock, or a wedge of dirt that’s higher than the rest. This culvert did not have enough of a downslope and it was also not a smooth downslope. I really should have done some hand-digging to make it better. But the excavator guy said it was fine and (doh!) I listened to him.
In all honesty, it’s really hard to override these macho guys who are also supposed to be the expert. But next time, I will send him away for 15-30 minutes, or get him to take a break, so that I have the time and space to really look at the slope, pipe, etc. and listen to my own body wisdom (who has dug more than a few culverts!). And unless you’ve got balls of steel (hey, ovaries are balls!), you can’t do this with him watching you! Seriously, it’s super important to get the guy to take a break (send him off to work on something else if you can) so you can take the time and space to tinker and get this perfect.
If you don’t believe me as to how important this is, then check out this quote from the ADS Drainage Handbook:
“The alignment or line of the pipe is the horizontal location of the pipe, while the grade is the vertical slope of the pipe. In order for a pipe system to function as designed, it is important to install the pipe to the proper line and grade.”
After watching numerous drainage videos on YouTube, I finally found someone who’d done the math!
So my culvert is about 50 feet total, divided by 8 = 6.25 inches. So that means my intake point should have been 6.25-inches higher than the drain’s exit point. In reality I think it is only about 4 inches higher, but, the slope of the trench under the pipe is also not even – I could see that as he was covering it with gravel.
And how do you check your slope?
2. Lay Enough Pipe
I should have laid pipe the entire length of the culvert – from the intake point before my hay storage, to the exit point out in the field – not just the area in front of the barn. When the excavator guy told me to get pipe, he didn’t tell me how many to get, so I just got 2 pipes. I should have halted work and driven back to Home Depot to get more pipe.
Note: the pipes fit together easily by just inserting the smaller end into the slightly larger end.
Now that I’m thinking about it, I realize that to get an accurate downslope in that culvert all the way from intake to exit, so the pipe lies evenly in the trough, I would need to allow about 45 minutes to an hour of hand-digging/smoothing time. And then I would test it first, by pouring water at the intake and seeing how it flows before letting him cover it with gravel.
It may sound really picky, but trust me, if you don’t get it right at this stage, it will not drain well.
And this was a 2nd-generation excavator guy who did jobs for farms and construction sites all the time. However, he missed a few key points that home drainage experts all insist on – and slope is the first one.
3. Use Geotextile or Silt Cloth
Most drainage specialists go a few steps further than we did. They first lay geotextile or silt drainage cloth along the trench or culvert. They also cover the entire length of the pipe with a cloth sleeve of a similar fabric. The first video below shows you what happens inside your pipe if you don’t do this! Basically, I would have to re-do my pipe in a few years anyway, because we didn’t use any drainage cloth at all.
4. Extra Gravel & Wrap in Geotextile Cloth
Here’s another crucial step we missed (I figured all this out by watching hours and hours of tutorial videos after my project was completed): After you’ve dug your trench, you should first line the culvert with geotextile or silt drainage cloth along the bottom of the trench, with the fabric extending evenly up both sides.
Next, you put a 2 – 3-inch layer of river rock or 3/4-inch gravel on top of the geotextile cloth. Then you lay your wrapped pipe (in the sleeve) on top of that gravel and you completely cover the pipe with more river rock.
Lastly, you fold the geotextile cloth over top to seal off the whole package and lay more 3/4-inch gravel or river rock on top of the cloth. In a horse area, I would put at least 3 inches of river rock or 3/4-inch minus gravel on top of the pipe, and then another 2 inches of crusher dust on top of the gravel/river rock.
Personally, here’s what I will do next time:
- Dig properly sloped trench or culvert
- Line with geotextile cloth
- Pour 2 inches of river rock on top of the cloth
- Lay the hard-side sewer pipe, holes down, in the trench
- Cover pipe with river rock (sides and top) so there is 2 inches of river rock on top of the pipe
- Fold geotextile cloth, up the sides and over the top of the pipe so there is at least 4-5 inches of overlap
- Put 3 inches of 3/4-inch minus gravel on top of closed geotextile cloth
- Put 2 inches of crusher dust on top of 3/4-inch gravel
Note: You’re not going to want river rock as your top layer, because river rock is too big to drop through the tines of the manure fork and will make your poo-picking nasty.
5. Dig Your Trench Deep Enough
If you go through my ideal scenario above and add up the layers of gravel plus 4 inch pipe, I’m looking at 13 inches. So my culvert will need to be 13 inches deep at the highest (intake) point of my pipe and then get deeper from there. Using the calculation given in Step 1 to figure out the amount of slope, and adding that to my intake depth of 13 inches, means I would need to dig my culvert down to 19 inches at the exit and 13 inches at the intake.
6. Choose The Correct Pipe
YouTube has a number of good tutorials on how to lay drainage pipe, and for residential projects, most seem to use a flexible (corrugated) drainage pipe. But you would need to be really careful about the specs of the pipe you choose to make sure it can stand up to thousands of pounds of weight/pressure. Most of the drainage pipes are designed to be used in people’s yards, so they don’t have the weight-bearing capacity necessary for horse properties.
These are the two best videos of the dozens of drainage pipe installation videos I watched, so be sure and watch both of these before getting started on your own culvert drainage project!
And head over to my detailed tutorial on how we took out the culvert and installed a French Drain which finally solved the problem.
Happy digging!

Jini Patel Thompson is a natural health writer and Lazer Tapping instructor. She began riding at age 2 in Kenya, and got her first horse at age 8 in Alberta, and so continues a life-long journey and love affair with these amazing creatures.





Great journaling! thank you for the mention. Yes, I would have steered you immediately toward the filter fabric, and properly build drain. I would also advocate laying down heavier-grade geotextile fabric (more of a plastic mesh) down on top of compacted subgrade soils after removing the soft organics, and before placing the surfacing (crushed rock). That prevents it from getting churned in with the soil below and extends the life of the improvements.
Hi Sarah, I did an experiment with laying the geotextile down first this year, then the layers of gravel. I was interested to see if it would work, as a woman had written in (who also lives in this Pacific Northwest climate) to tell me that it’s never worked for her horses. And unfortunately my experience has been similar. I think the “punchiness” of horses hooves disturbs the gravel so much, that all that needs to happen is for them to punch through to the geotextile in a very small spot and then that quickly enlarges. And then the cloth gets moved around by their hooves.
We tried it in two places – under a shelter with 6″ of gravel (3/4″ minus) and then crusher. And in a paddock entryway with 8″ of gravel/crusher. Destroyed in a couple of months once the rains started – the cloth is either sticking up all over the place (the other woman said her horses would then grab it in their teeth and pull on it – we just cut it off), or it has disappeared into the muck.
I will say, this year is the worst for rain we’ve had in a decade or so – tons of houses have had their basements flooded for the first time ever. So the load has been unusual. But thought I’d let you know the results anyway.
We called Parks & Rec – who lay the horse trails in the provincial parks here and asked them what they did. As their trails seem to stay in pretty good shape all winter long. They do things a little bit differently:
After scraping down to the compacted subgrade soil, they place a layer of large, flat rock. Then they add gravel and then crusher dust. I have never heard of using the large, flat rock before! I used 3″ rock chunks on my barn road (which already had gravel on it from past years, but had gotten mushy/unstable in spots) and that has held up amazingly well – for 3 years now and haven’t had to add more. Of course, the wear n’ tear on that barn road is completely different from the 11 horses, all day long, with punchy piston hooves. But still, it gives me faith that the large flat rock might be missing ingredient here. Will try that next!
Thank you for telling your story. I don’t feel so alone. I’m at stage one with hand dug trenches at the roof drip line of my barn. I will invest in the proper french drain installation but have one big functional concern which I hope you can answer. I live in northern New England with 6 months of frozen ground (4’ deep frost line). My problem spot happens when snow melts off the barn roof or we get rain during the winter. How does water reach the french drain when the ground is frozen?
Hi Beth – can you install eavestroughs on your barn roof and collect the meltwater/rain into rubber troughs? Not only would your horses love this, but it may go a long way to solving the problem. I use the big 180 gallon rubber troughs and then I tilt them slightly (by putting a strip of 2×4″ wood under one side) so that when they’re full and the water is overflowing, it goes in the direction I prefer. This is similar to the ones I use:
https://www.agrisupply.com/oval-tank/p/39389/
I’ve contemplated this before, however it would only deal with rain. When a big snow begins to melt, huge piles of wet snow slide off the roof into the hand dug ditch. Gutters are not going to be any help with this. Secondly, water that drains from other areas of the pasture have to pass by the barn somehow on the way to the major drainage swale downhill from the barn. Thanks.
Oooh sounds like you’ve got a difficult situation for sure. I had emailed my cousin about your initial question and he wrote back:
“Hmmm, it’s hard to picture her problem because it’s not a simple problem like yours is – she must have snow on the ground much of that time and that absorbs water, dams it, makes it run places you don’t want it to, etc..
My first suggestion would be to set the drain below frost line or very close to it, with 45º sloping banks each side of the trench, completely cover with ‘sharp’ rock (not rounded river rock or similar) so it locks together, then a thin layer of large diameter gravel over to finish? – the ground can’t freeze solid if there are lots of spaces within it and any water that might fill those spaces has already drained away, right? That said, if the ground is REALLY hard frozen then I suspect that any water running thru it will freeze on contact and gradually choke it. I guess it depends on lots of factors like intensity of flow, temperature, etc.. ”
I also did a quick Google search on “dealing with snow melt on barn roof” – you might want to try that and see if you get any ideas. Here’s one that might help:
https://www.hansenpolebuildings.com/2013/04/snow-melt-drainage/
Let us know if you figure out a solution! And post some pics if you can as that will help us to see what you’re talking about 🙂
I think your brother may have answered my question! I was concerned that after going to the expense of putting a French drain below frost line that any water or snowmelt that happened during the winter would not be able to reach the drain because it would freeze along the way. But from what he said, The gravel would prevent this from happening. Perhaps some small amount of heat rising out of the ground below frost line would assist as well? (I have automatic waterers that work off this principle) Thanks so much!!
Hahaha, you were persistent! Your old problem is so close to me, I have a fairly rainy climate near Lafayette, LA and as a result – a lot of dirt in the rainy season. Now I just have to build a French Drain according to your guidence! Much thanks