After numerous experiments with culvert drainage for my graveled horse paddock, I finally decided to start all over again and do it properly – from start to finish. My cousin Adam was in town and since he used to work in the UK (also rainy!), has an architecture degree, and has worked on numerous building projects, I felt we finally had a good chance to get this to work! Adam not only studied French Drains in college, he’d also installed several. So here’s our step-by-step guide, showing you exactly what to do.
I’m going to give you the steps first – so when you’re standing out there constructing yours, you can quickly scroll through the steps and make sure you’re on track (and not forgetting a step!).
Next, I’ll take you on a pictorial journey of how we constructed my paddock drain, so you can see all the details.
Note: I have another detailed post if you want to know how we created the paddock footing, paddock drainage surfaces, how to create a drainage layer on your paddock using gravel, etc.
How to Install a French Drain for your Horse Paddock
1. Watch the Water – study your paddock (or field) when it is raining and watch where the water wants to go. If we can work alongside what already wants to happen on our land, we can be the most efficient.
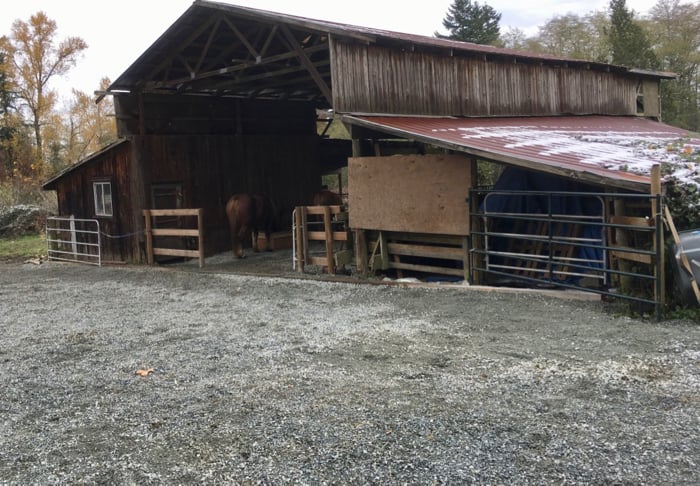
For my paddock, I had two drainage paths: One came from behind my hay shed and flowed out near the entrance to the shed. And the other drained from the top of my paddock, towards one side and into the barn.

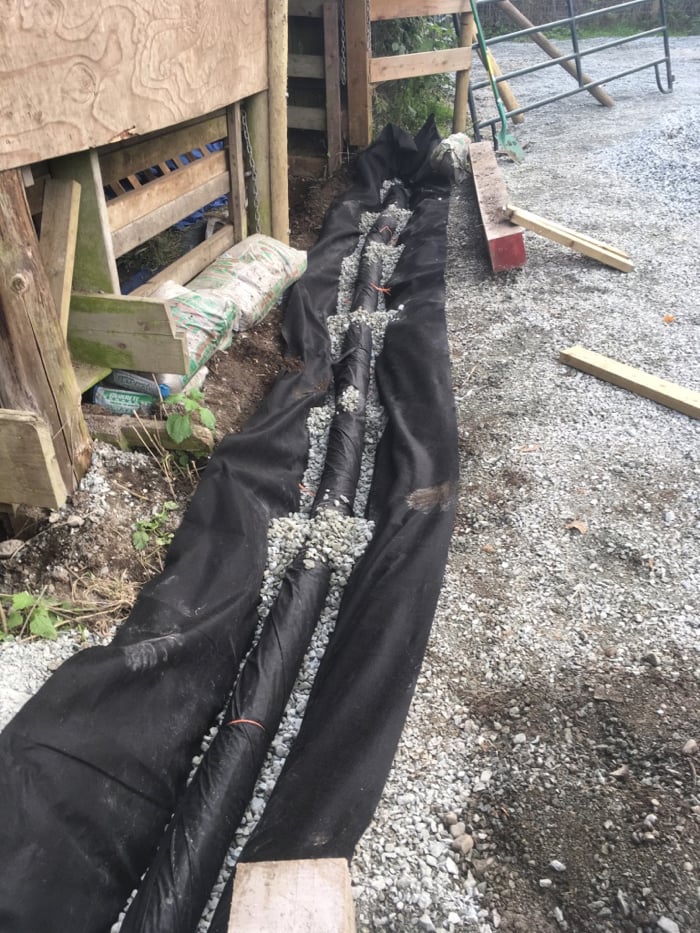
So for my place, we installed a french drain along the entire length of the paddock from the hay shed, past the barn entrance, and out into the field. We also placed cedar timbers on top of the drain as a physical barrier against the water running along the top of the gravel during a hard rain:

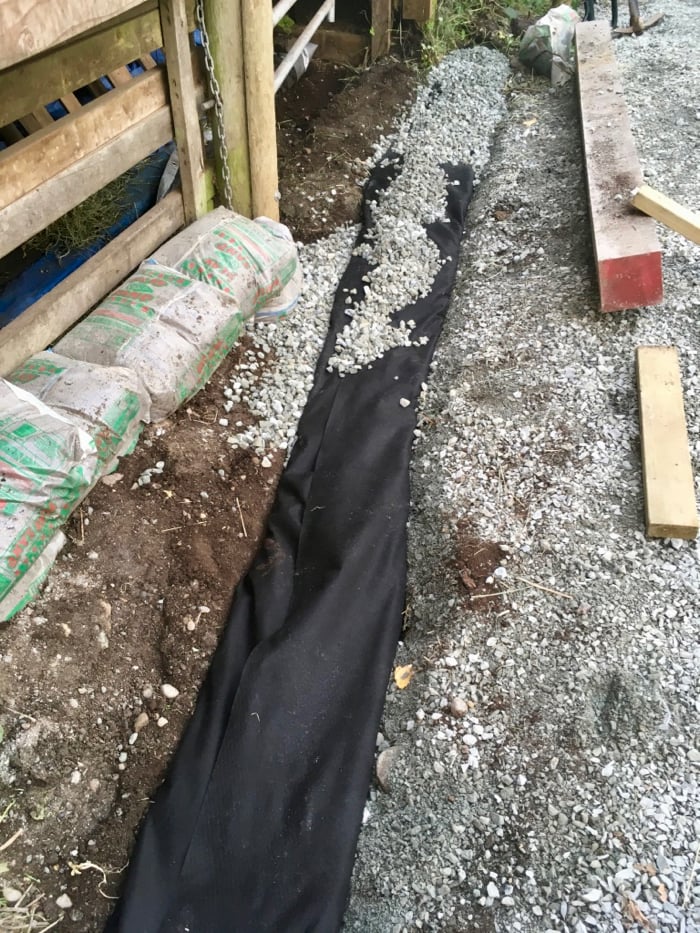
Then I also dug a culvert in the dirt under my pallets in the hay area, along the path the water was already flowing, filled the culvert with 1/2 inch clear crush drainage rock, and joined it up with the path of the french drain. After lining this mini-culvert with drainage gravel, I put the edge of the tarp back down on top of it:
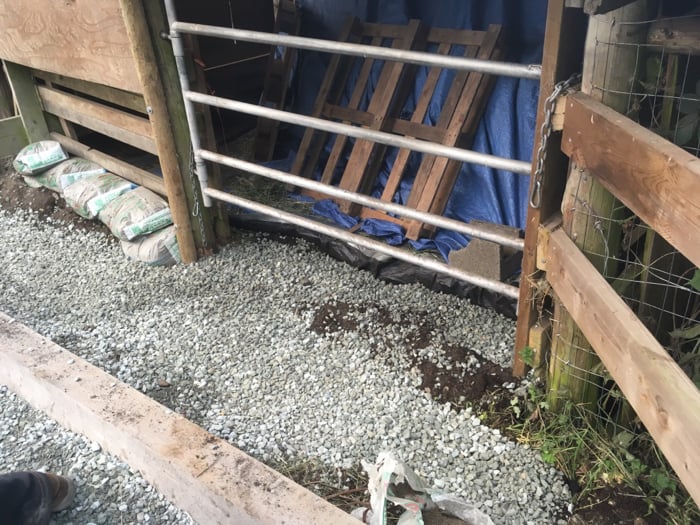
2. Purchase all Materials – Unless you can close off the area you’re working in for a few days, you’ll need to start and finish the job in one day. So best to have all your materials ready to go, and a couple of helpers!:
- 4-inch diameter perforated drainage pipe – ideally one that comes with a ‘sock’ around it already, like this one.
- If you can’t find one wrapped already in drainage cloth, then purchase geotextile or landscape drainage cloth to wrap around the pipe – at least 12 inches wide.
- Additional Geotextile or landscape drainage cloth to line your culvert and then wrap around your gravel-covered pipe; this needs to be at least 4-feet wide and 18 inches longer than the length of your trench
- Clear crushed gravel to line and cover your pipe. Smooth river rock is no good as it moves around too much. Crushed gravel with fines (eg. 3/4 inch minus) is no good as it packs down too tight and inhibits drainage. So you want the rough edges of crushed gravel, to fit/lock together, but you want it clear of dust and smaller gravel pieces. Anywhere from 1/2 inch – 1 inch clear crush is good.
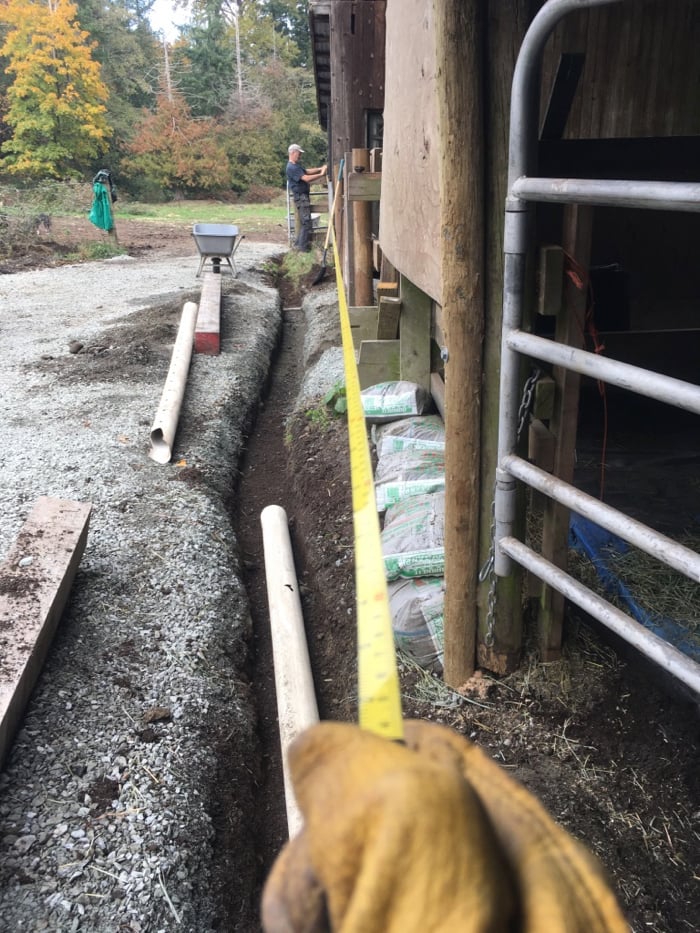
3. Mark & Dig your Trench – Mark out the length of your trench. It doesn’t need to be perfectly straight, it can curve a bit, if desired. And the width of your trench – using a 4″ drain pipe – should be 1 foot wide. See #4 & 5 to figure out the depth of your trench. Use a pickaxe to loosen packed earth and rocks, then scoop out with a pointed shovel and into a wheelbarrow. Dump earth somewhere handy, as you may need it later.
4. Figure Out your Slope Gradient – Once you have the length of your trench in feet, multiply that by 0.125 – the resulting number is the difference in depth between the start of your trench, and the end point; which will ensure you have enough slope gradient for water to be drawn down to where you want it. You need at least 1/8 inch (0.125 inch) of slope per foot.
For example, our trench was 50 feet x 0.125 = 6.25 inches. So that means the bottom of our trench needs to be at least 6 and 1/4 inches lower than the top of our trench for the water to drain properly; especially during pelting rain.
5. Figure out Your Trench Depth – Next you need to calculate the depth of the start, or top end of your trench – this depends on whether the horses will be walking across your drain and whether you are putting timbers on top of your drain, like we did, or not. Add up:
– 1-2″ gravel on the bottom
– 4″ pipe
– 2″ gravel on top of pipe
– 2-6″ gravel on top of geotextile cloth – if horses will NOT be walking on the drain, or, if you are laying timbers on top of the drain, then you only need 2 inches of gravel. If you are not laying timbers and your horses will be walking on the drain, then you need to lay 4-6 inches of drainage gravel on top of the geotextile cloth.
Since we were adding timbers on top of our pipe, we figured 9 inches was good for the start (intake) of our trench, and so the end (outflow) of the trench needed to be 15 and 1/4 inches deep (9 + 6.25 = 15.25 inches) to provide adequate slope for good drainage.
6. Line your Trench – Stomp down the dirt when you’re finished digging and line it with your geotextile or drainage cloth.
7. Add the Bottom Layer of Gravel – Pour 1-2 inches of drainage gravel along the entire length of your trench. Use the gravel to even out any uneven spots in the earth (creating a flat bottom for the pipe to lay on), making sure you have at least an inch of gravel at all places.
8. Wrap your Pipe – If your drain pipe did not come with a sleeve, then you need to wrap it tightly in another piece of drainage or landscaping cloth. Secure the cloth with zip ties or twine, so it doesn’t unwrap.
9. Lay Pipe in the Middle of the Trench – Now lay your wrapped pipe on top of the base layer of gravel in your trench. Hold the pipe in the middle of the trench as you toss gravel along the top every 2-3 feet to pin it to the center of the trench, all the way along.
10. Cover Entire Pipe with Gravel – Cover the entire length (and fill in the sides of the trench) of your drain pipe with at least 2 inches of gravel covering the top of the pipe.
11. Wrap Geotextile Cloth Around Pipe & Gravel – Tug up the sides of the drainage cloth lining your trench, and fold the cloth over the top of all the gravel and pipe you have just laid.
12. Cover Completely with Drainage Gravel – Cover the entire top of the geotextile cloth with more drainage gravel. If you are NOT putting timbers on top of the pipe, then you need to put at least 4 inches of gravel on top of the geotextile/pipe – 6 inches is ideal, as the horses will kick and move the gravel around a lot. If horses will not be walking on your pipe (or you are laying timbers on top like we did), then you can put only 2 inches of drainage gravel on top.
Paddock Culvert & Drain Pipe Tutorial
Alrighty, now that you’ve had the overview, let me take you on a pictorial journey of exactly what we did (where the learning really sinks in) and how we did it.
The Pipe
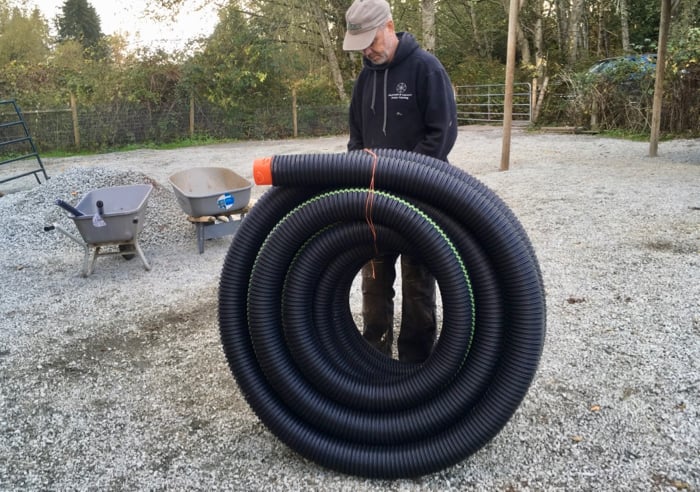
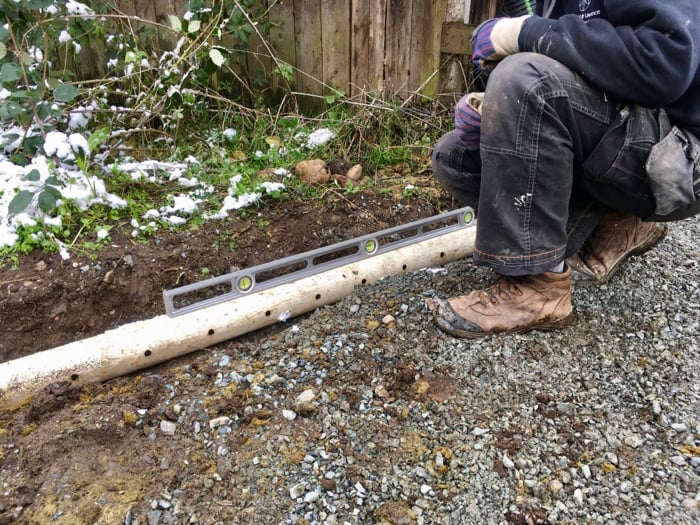
This is the pipe we bought from Home Depot – 100 foot perforated pipe that is quite light and easy to carry:
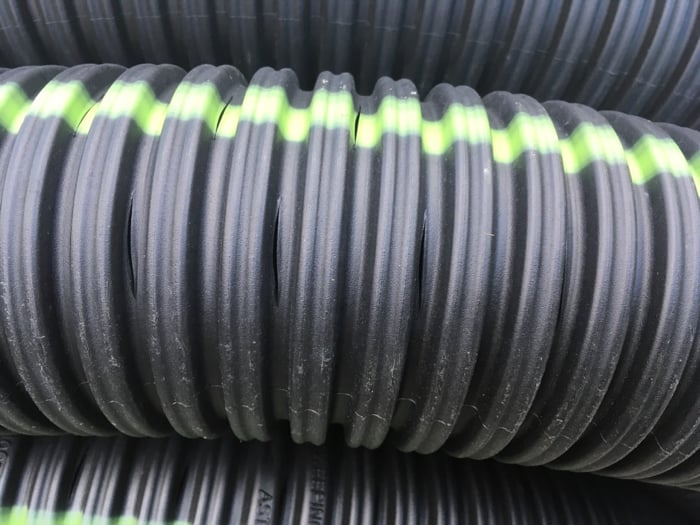
This is what the perforations look like:
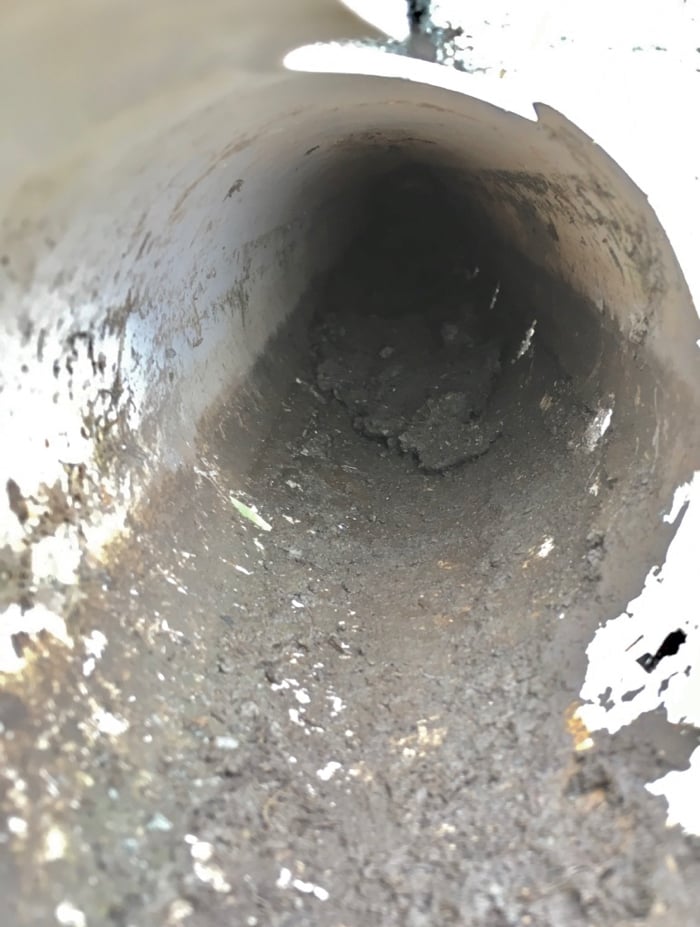
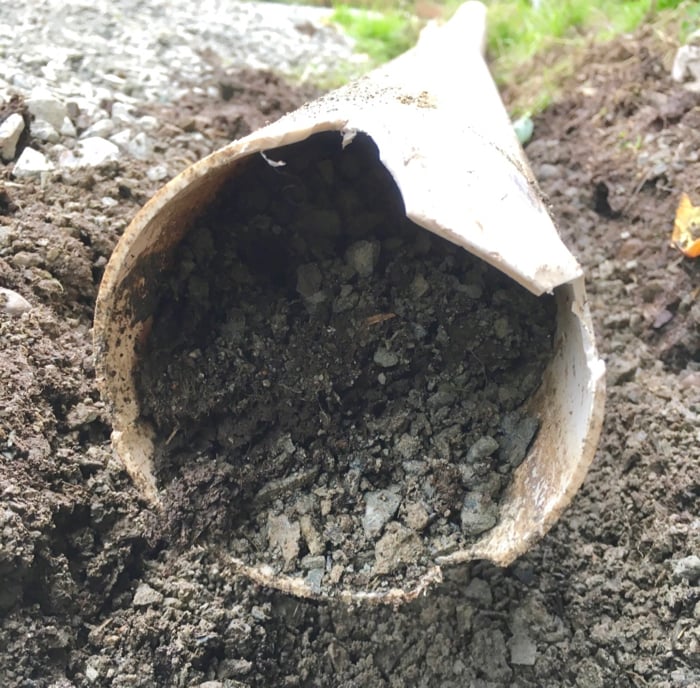
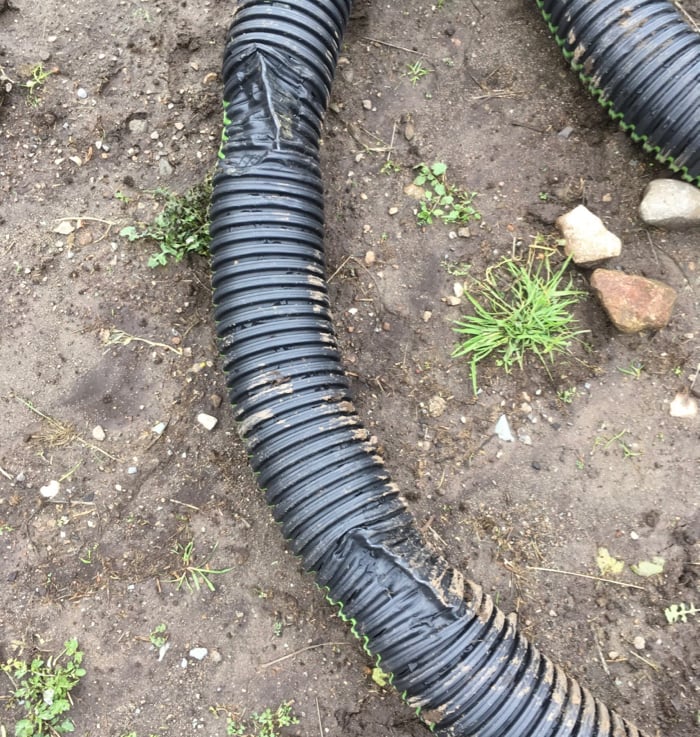
Even though the holes are small, if you don’t wrap the pipe and then the entire drain in geotextile or landscape drainage cloth, this is what can happen. This is the previous pipe I installed without drainage cloth after only 1 year:
Digging the Trench
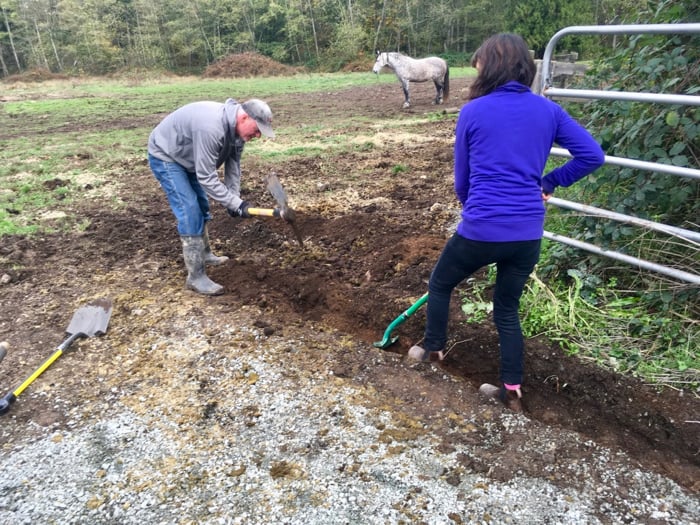
We found the most efficient way to work (because we had to get this entire drain finished in one day) was to have one person break up the soil, clay, rocks with a pick-axe and have another person follow them with a pointed shovel to dig out the trench. In the paddock we shoveled the soil into a wheelbarrow so it wouldn’t dirty the gravel and dumped the soil nearby in case we needed it again..
Once the trench was dug, we checked the slope. Adam had a string level app on his iPhone so we used that to check:
However, we weren’t sure the app worked well/properly so we then laid the old pipe in the trench and poured some water in the top to see if it flowed out quickly and easily:
At the outflow end of the pipe, in the field, we put the old pipe in the trench and Adam checked the slope using his level. Did you notice I just gave you 3 different ways to check your slope gradient? 🙂
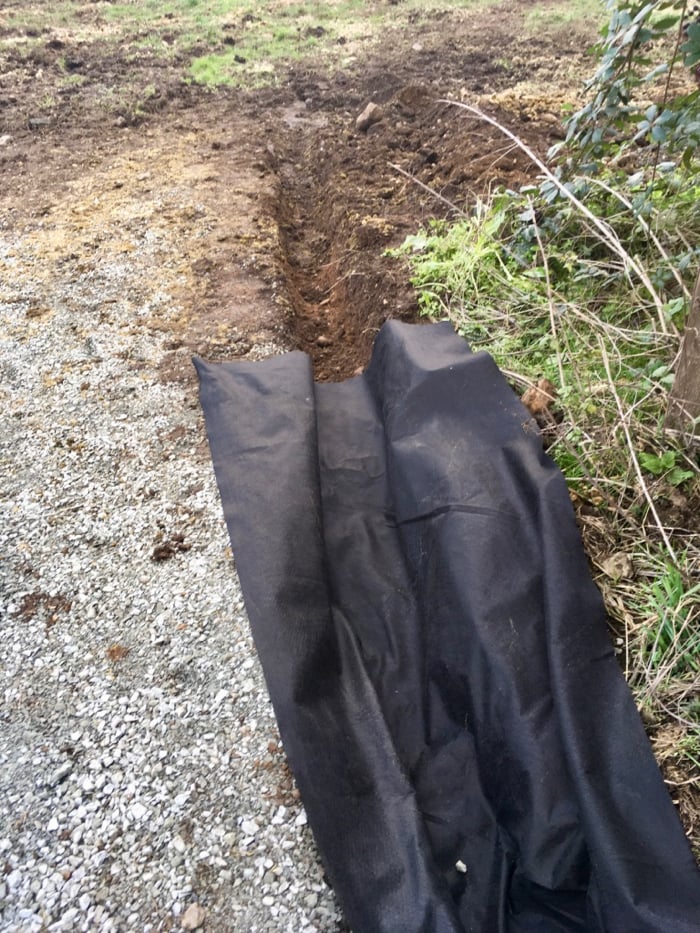
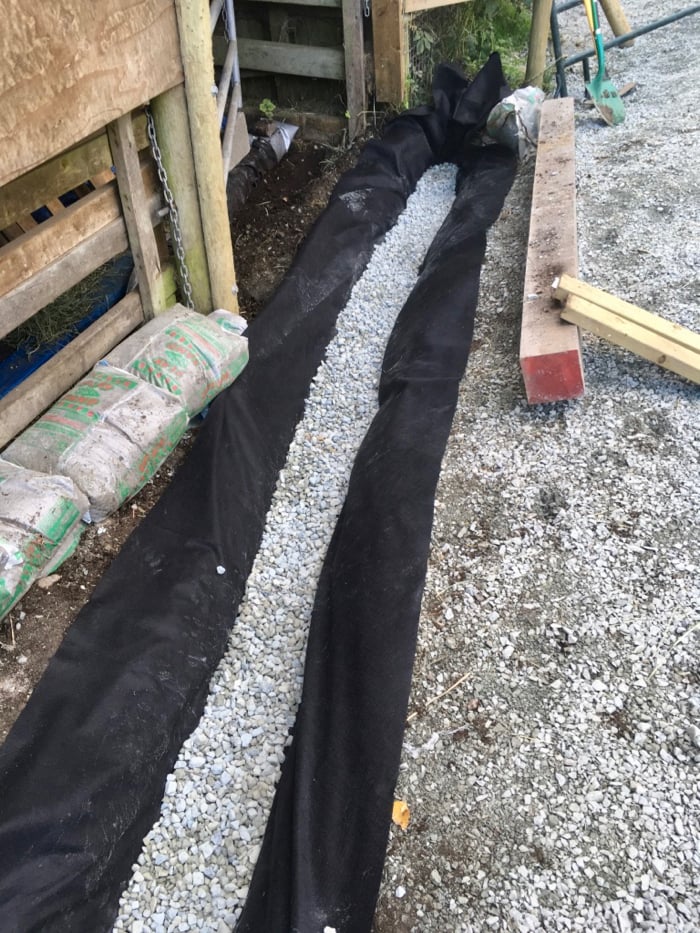
All good! So time now to line the trench with the geotextile or landscape drainage cloth:
Then we put an inch or two of the drainage gravel along the bottom of the trench (on top of the cloth):
What Kind of Gravel?
As I mentioned above, we got 1/2 inch Clear crushed gravel (with no dust or smaller bits in it). This locks together so the gravel doesn’t move around when the horses walk on it, but it allows the water to drain through it. This is what it looks like:

Just for comparison, this is what my paddock gravel looks like – this is 3/4-inch Minus crushed gravel which packs up nice and firm but doesn’t allow for quick drainage of water:
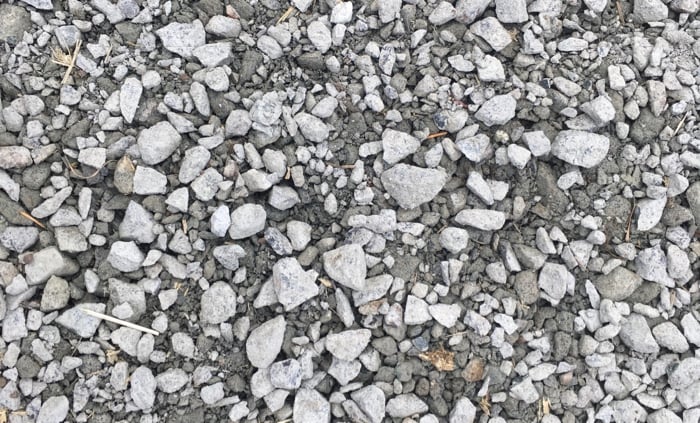
For our 50 foot French Drain, we ordered 3 cubic yards of Clear Crushed Drainage Gravel and it was just enough. If we had not placed timbers on top of the pipe though, we would have needed at least 5 cubic yards.
Wrapping the Pipe
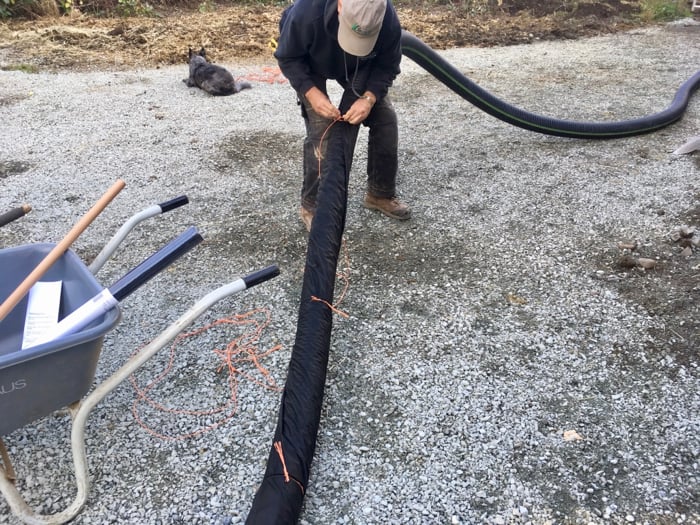
Before we laid the pipe in the trench we wrapped the entire length of it in landscape drainage cloth and tied it with baling twine every couple feet to keep it wrapped tightly:
Don’t forget to completely cover the intake end of the pipe:
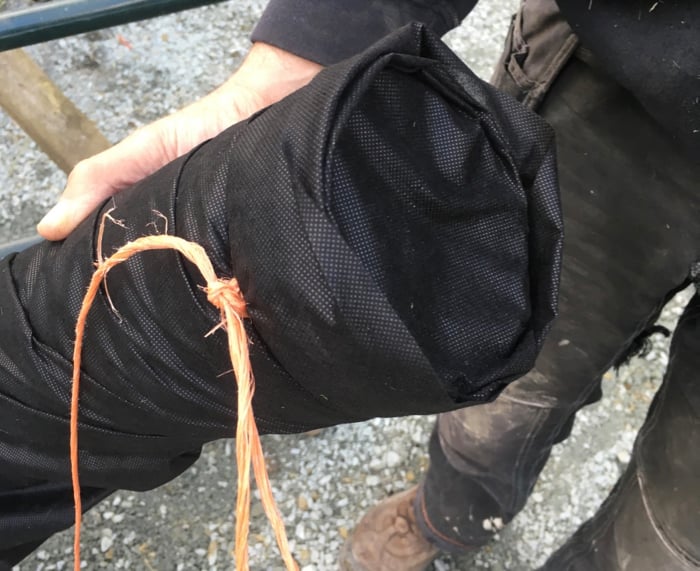
Next, we laid the wrapped pipe in the middle of the trench, on top of the first layer of gravel.
The Giant Snake
It was also time to decide how much pipe to extend out into the field and cut off the unwanted length with a handsaw. You can see how curious the horses are and why you don’t want to leave your pipe unattended or exposed.
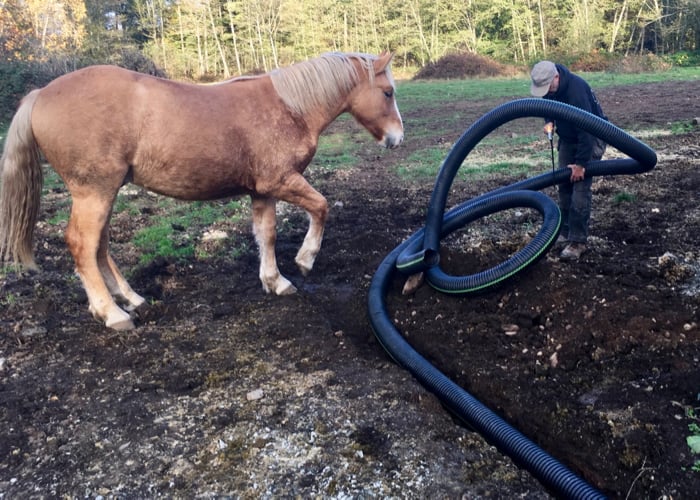
In fact, I gave them the extra pipe to play with and this is what they did to it. I actually kept some of it to play with later – they were quite freaked out by the idea of this black plastic snake going around their neck, so that’s something we can monkey about with later, so they can no longer be afraid:
Laying the Pipe
Now that we had the pipe cut to size, we threw gravel in piles along the length, to pin the pipe to the center of the trough. Once you have the pipe fixed in place in the middle, it’s easier to throw gravel quickly on top to fill up the sides and then an inch on top of the pipe. If you don’t pin it in place first, your shovelfuls of gravel thrown on top or sides will knock your pipe out of position.
Once we had filled up the sides of the trench with gravel, and covered the entire top of the pipe, Adam stomped it down and smoothed out the gravel to make sure it evenly covered the pipe:
Geotextile Burrito
Then it was time to fold up the outer layer of geotextile cloth to cover the entire contents of the trench. Again, just like when we wrapped the pipe, the intake end of the drain has to be covered completely by folding the trench cloth over the top:
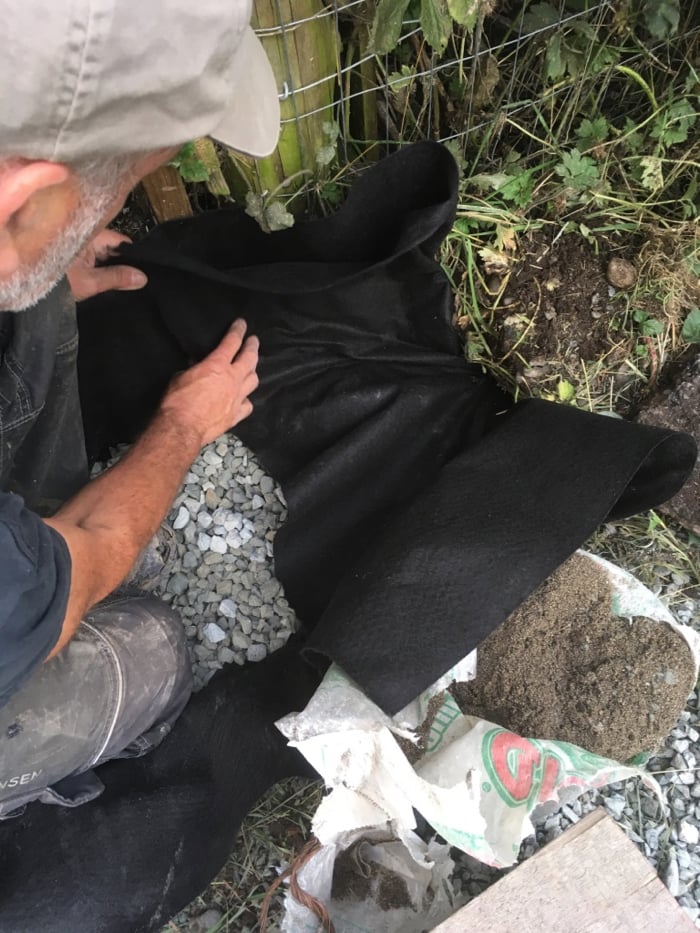

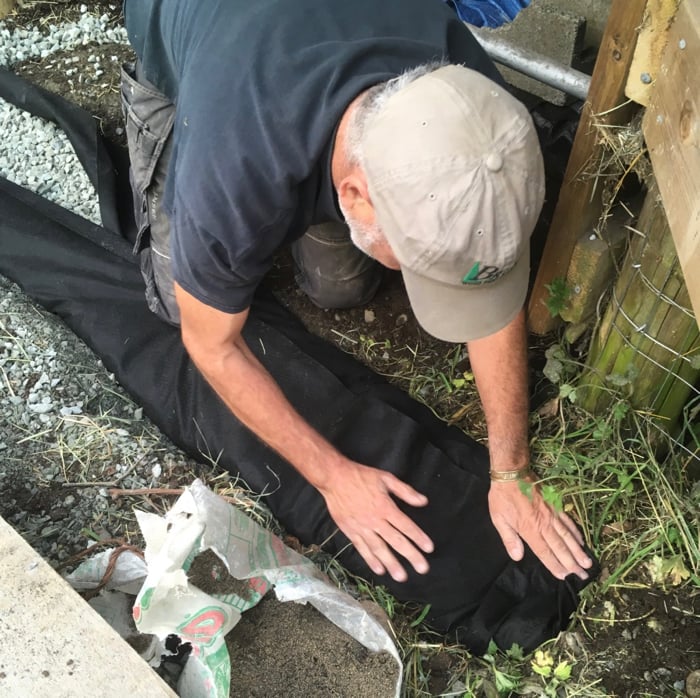
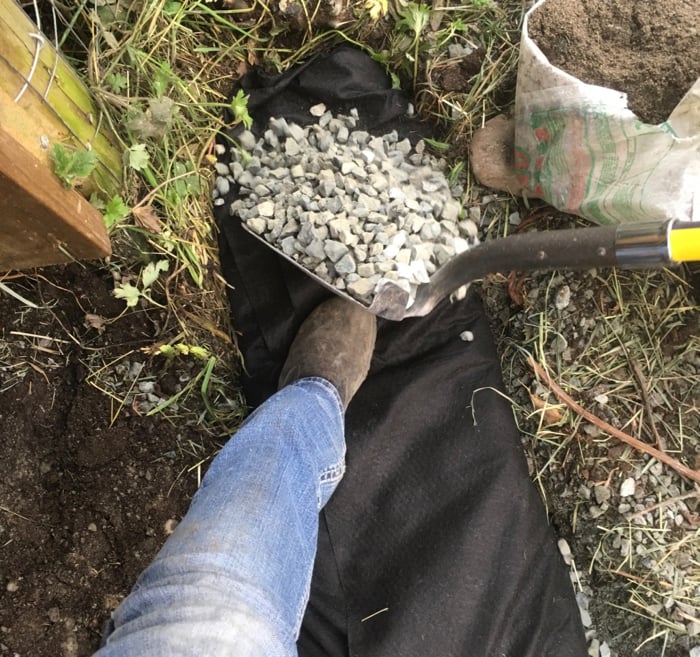
I held the geotextile wrap in place with my foot, as Adam pinned it shut with a shovelful of gravel:
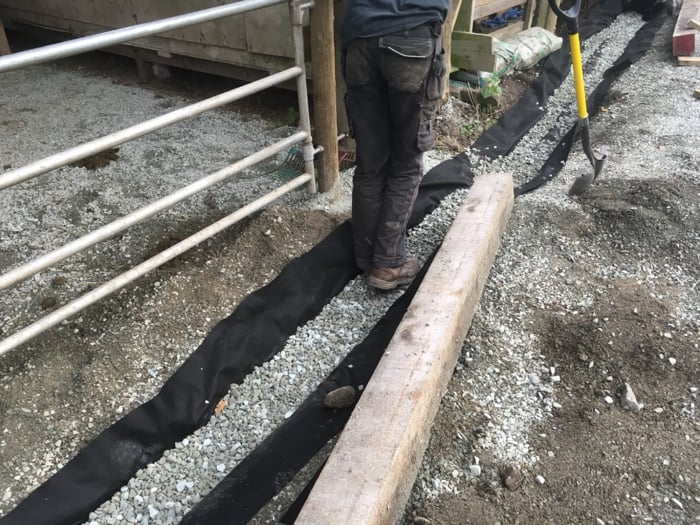
Again, just like we did with the pipe, it’s faster to first use just a bit of gravel to pin the wrapped cloth in place along the entire length of the trench, then throw the rest of the gravel on top to completely cover the geotextile cloth:
We covered the geotextile burrito with about an inch or two of drainage gravel, then Adam stomped it down to smooth it:
Laying the Timbers
Finally, it’s time to lay the cedar timbers on top. When the rains hit hard for 2 – 3 days continuously (or 2 – 3 weeks!) the water starts to run on top of the gravel as well. So I also wanted a physical barrier to stop the water from washing down over top of the gravel and into the barn. We figured these big 6-inch square, 10-foot long cedar timbers would do the trick. Cedar can withstand a lot of water without being treated and the cedar yard sold me these for half price because they were old and had sat out uncovered for a while – perfect!
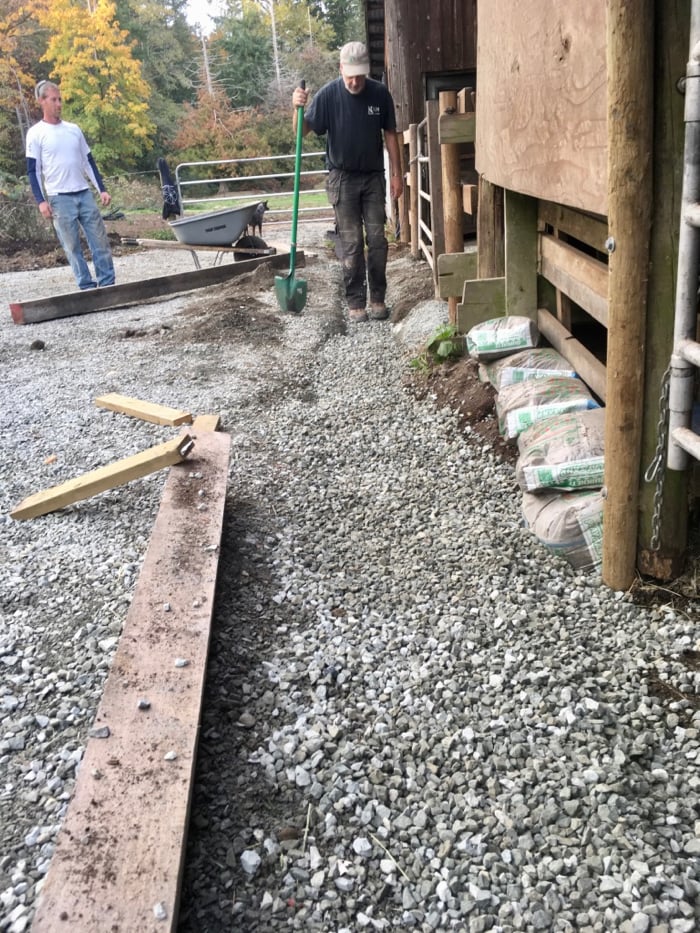
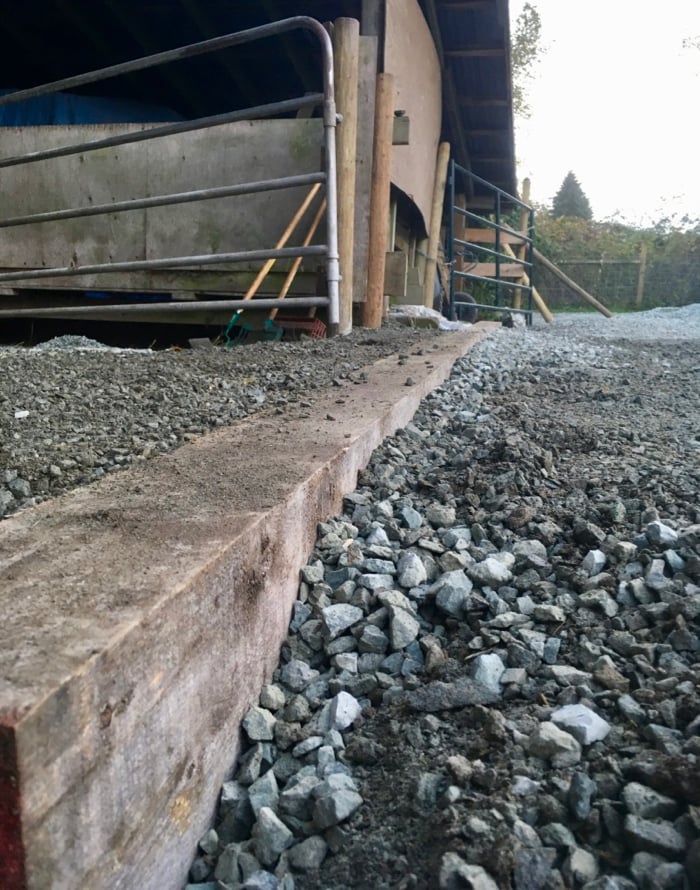
We left about 1.5 – 2 inches clear at the top of the timbers to stop the water like a dam and then filled in the front (drainage) side with drainage gravel.
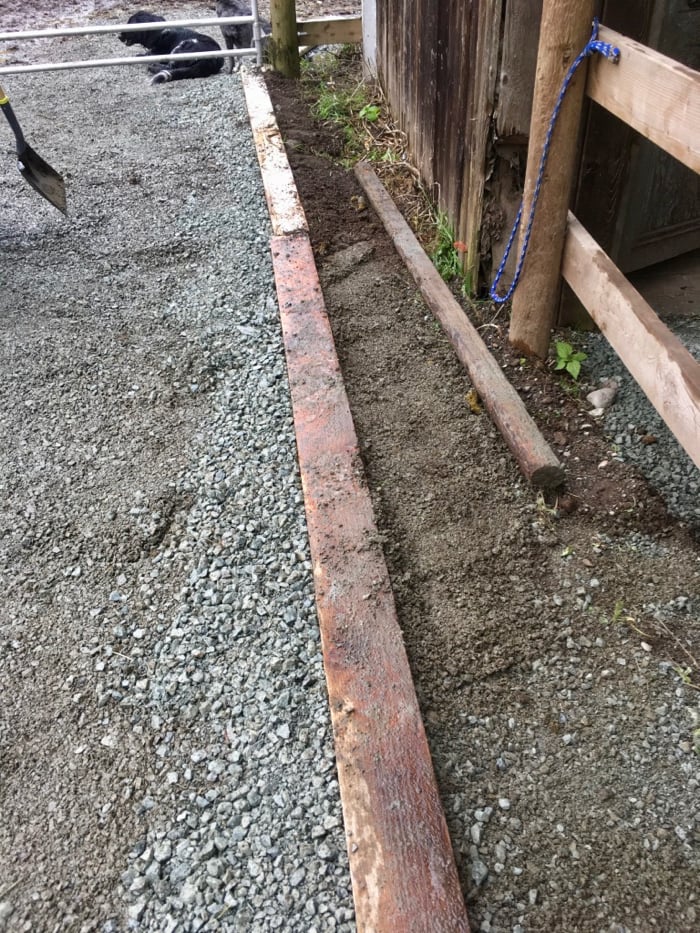
Along the backside (no water problem there), we packed the timbers with earth or regular paddock gravel, and even used some sandbags I had lying around. We needed to inset the timbers and then pack them on both sides so they wouldn’t shift when the horses walked (or wrestled!) on top of them.
At the field outflow end of the pipe, we covered that with drainage gravel too – about 3 inches – and then put a 2×12-foot plank on top of the gravel and piled rocks we gathered from the field, on top of the last section of pipe, at the end. I hope this will encourage the horses to step over the pipe once this area dissolves into 18 inches of mud. I will go out later and see if I can find more rocks to replace the board – I think the rocks will be an even better deterrent than the plank. But it’s fine for now.
Ta-da! The finished French Drain. Here’s to a drier, happier winter for all of us!:
By February, this drain showed its worth as we were flooded with 3 weeks of almost non-stop rain. Not only was the barn and paddock kept dry, but at the outflow end of the pipe, the water was flowing out with enough force to create ripples and displace silt!
If you want to make sure you are super fluent before you start digging, then watch these videos that take you through a similar tutorial. These are the two best videos out of the dozens of drainage pipe installation videos I watched:

Jini Patel Thompson is a natural health writer and Lazer Tapping instructor. She began riding at age 2 in Kenya, and got her first horse at age 8 in Alberta, and so continues a life-long journey and love affair with these amazing creatures.





Excellent article, very helpful. Just moved onto a property in Mud River (aptly named) and was looking for some DIY fixes to a mucky problem!
Hi Jini!! Your website is so very helpful, thank you! Would this french drain be usable to create a pee/urine drain under their over-hang? Or would you make some adjustments? I was planning on making it wider and since it’s under cover it wouldn’t be used for rain water just hosing down for cleaning. Thank you in advance!
Hmmm Pernilla, that’s an interesting question. The only factor I can think that might impact your intended usage is that this drain doesn’t drain water QUICKLY. If we get an absolute downpour, it can take a while for the water to drain through. And with hosing you are flushing a lot of water quite quickly. But then mine are walking back and forth across it so that could also be what’s slowing down the drainage. This article might be useful for you:
https://www.gardenista.com/posts/hardscaping-101-french-drains/
Good to know about the drainage and I’ll take that in consideration and thanks for the link, very helpful. Love your site and your horses!!
Thank you 🙂 And I love your name!
Love this article. I never knew I would be spending so much time researching mud free horse areas. I’m about to put in a french drain (with professionals) but I want the drain to be how I want it..and not go blindly into this expensive project. I am hopeful that this is a once and done project with upkeep of course. I am going to be installing about 250 feet of drain. Double drain down the front of their barn (they are free to come and go 24/7) and it get real bad in the wet weather and then going down the side and behind the barn..we also have a wet weather spring, and produces water everyday in the wet weather and drys up only in the hot summer. ..and it runs straight to the barn. I’m going to add a cap to the highest point in my drain, so I can access it and if needed flush debris out with the hose. Thanks again very informative.
Good for you! I can’t tell you how many “professionals” have totally mucked things up at my barn 😉 Have a marble handy to physically check that the drain is sloped adequately (if you can’t test with water) that’s one of the key things that pros don’t take seriously enough. Good luck!
Yes, a marble how smart!
Thanks very much for these very clear, well-illustrated instructions, and the supplementary tutorials! I now feel that I can successfully build my own French drain.
Awesome Emily! Let us know how it goes 🙂
Hi! love this and we want do do this in our paddock. but i got a question, not drain related though.. is you gravel paddock easy to take out the poop of the horses? i would love for our horses to have some differend ground to walk on, but we have to be able to get the shit out.. 😉
Here you go Maartje – detailed answer with pics is here:
https://listentoyourhorse.com/which-paddock-surface-is-best-for-a-rainy-climate/